
Call of Duty 2 Tweak Guide
[Page 6] In-Game Settings (Pt.2)
[Texture Settings]
These settings control the quality of all the textures used in Call of Duty 2. Textures are the 2-dimensional images which cover all the 3D objects in the game.
Texture Quality: The options here are Automatic and Manual. If set to Automatic, the options below won't be visible - only the Texture Quality option will be shown, and COD 2 will automatically determine the appropriate texture, normal map and specular resolutions based on its approximation of your graphics card's capabilities. However if you're willing to experiment, set this option to Manual, and adjust the various settings below to improve image quality and performance. Note that the image quality comparisons are shown for each setting below, but the performance impact can vary depending on your particular graphics card.
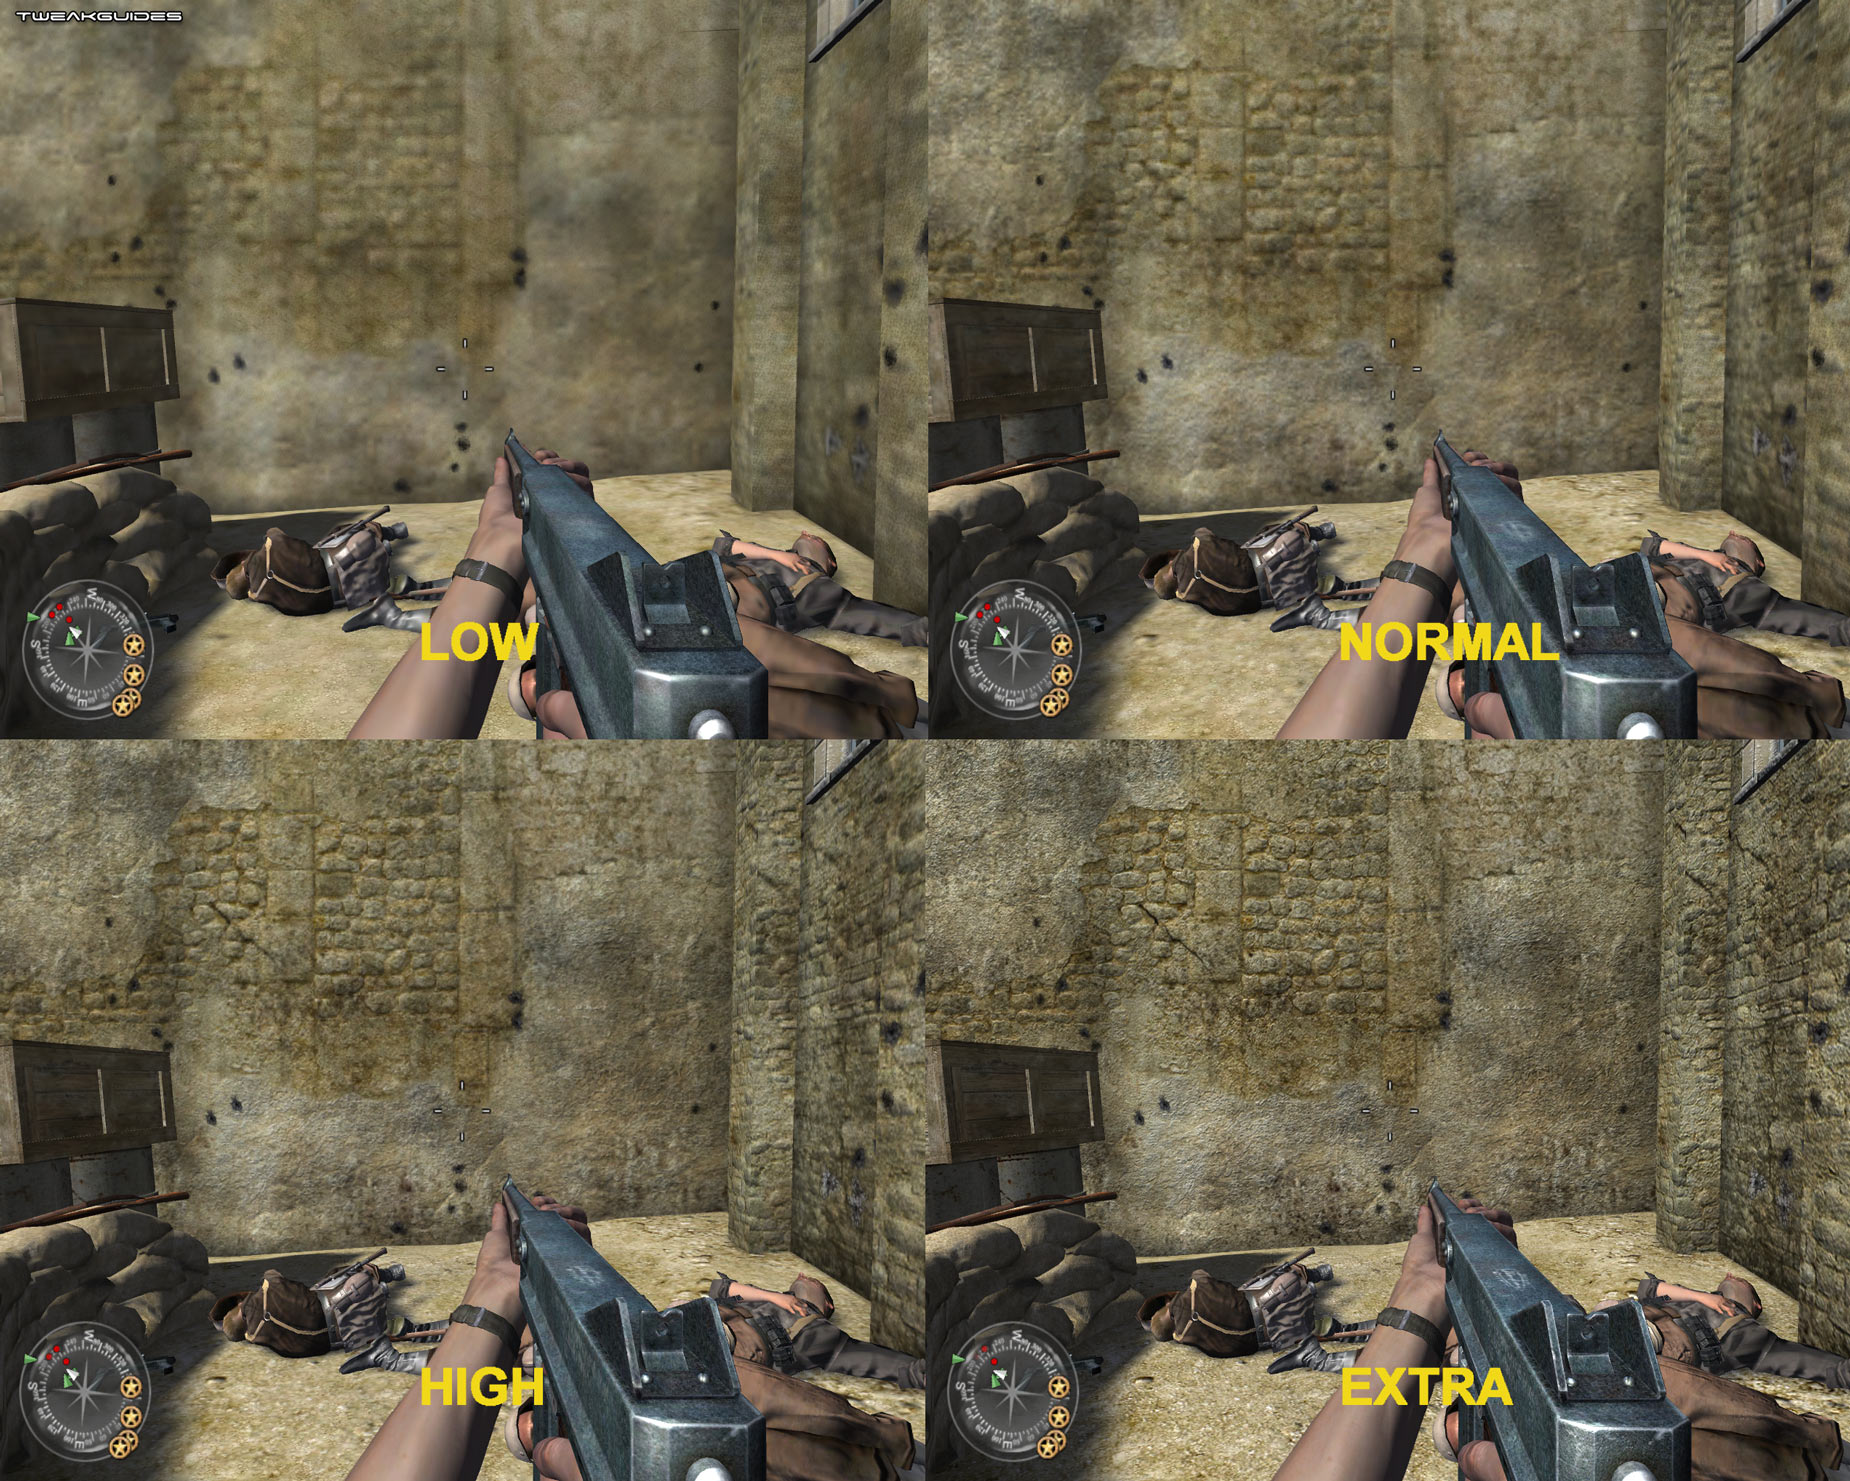
The screenshot above shows the image quality of these settings when all three are set to the same level (All to Low, All to Normal, All to High and All to Extra). An animated screenshot comparison can be seen by clicking this link: Texture_Quality.gif (658KB). The details and image quality impacts for each of these settings are provided below:
Texture Resolution: This option controls the general clarity of all textures used in the game. The available options are Low, Normal, High and Extra. An animated screenshot comparison can be seen by clicking this link: Texture_Resolution.gif (814KB). Note that there is a gradual difference visible between each level in the comparison above. You should base your texture resolution setting on the amount of Video RAM you have on your system - Extra is for 512MB and high-end 256MB graphics cards, High and Medium are suitable for 256MB - 128MB cards, and Low is suitable for those with 64MB of video RAM. Of course experiment to see what works best on your particular card, as depending on your other settings here, additional DX9 effects and/or Antialiasing for example, you may get more or less of a performance slowdown from higher texture settings.
Normal Map Resolution: This option controls the level of detail shown on textures, such as bumps and grain. The available options are Low, Normal, High and Extra. An animated screenshot comparison can be seen by clicking this link: Normal_Maps.gif (636KB). Note that as the normal map level is raised, the depth of the pitting in the wall becomes more realistic. The performance impact of this setting varies depending on your graphics card's memory bandwidth as well as its compression technique, and as such newer high-end graphics cards can render higher normal map resolutions with minimal performance impact, whereas lower end and older graphics card will require lower settings to maintain good FPS.
Specular Map Resolution: This option controls the way in which objects reflect light. The available options are Low, Normal, High and Extra. An animated screenshot comparison can be seen by clicking this link: Specular.gif (639KB) - note that as the level of the specular map is increased the reflections on the car's metal roof become more detailed and realistic. The performance impact of this setting will vary depending on the age of your graphics card.
Some final things to note above these settings:
Sound
Master Volume: This slider controls the volume level of sound effects and music in the game. Adjust to suit your taste, has no impact on performance.
Sound Quality: This option controls the sample rate of sound effects and music playback in the game. The available options here are 11KHz, 22KHz and 44Khz. The higher the sample rate, the better the audio quality in return for a slight performance hit. In general 11Khz sound quality is quite poor, and many sounds are almost AM radio quality; 22KHz is a good balance of performance and audio quality; however if you have a reasonable sound card there is no reason why you can't set this to 44KHz as the performance impact should be minimal.
Sound Provider: This setting determines the sound playback mode used by your system. The range of options from lowest to highest include Miles Fast 2D Positional Audio, Creative Labs EAX, Creative Labs EAX 2.0, and Creative Labs EAX 3.0. If you have a suitable sound card, you can choose one of the Creative Labs EAX options to provide 3D audio with a range of additional audio effects (depending on the EAX version). Almost all SoundBlaster Audigy and X-Fi sound cards should be able to select EAX 3.0 for optimal sound quality with minimal performance loss. Note, if you are using EAX mode, make sure that you update to the latest sound drivers for your card, and also make sure to disable any additional effects in your EAX Control Panel (under AudioHQ). However the higher the audio mode you choose here, the lower your FPS will may be because of the extra processing load. The impact may only be noticeable on certain onboard sound solutions and low-end Creative sound cards for the most part, however if you want to be guaranteed the fastest possible performance, opt for the base level Miles 2D mode. This mode can also fix any audio glitches you may have while using EAX.
Game Options
Subtitles: If set to Yes, text subtitles will be shown on the screen whenever there is any spoken language. Set this to No unless you require this functionality. No noticeable impact on performance.
Enable Crosshair: If set to Yes, this option enables the crosshair on the screen - very useful for aiming your weapon, and obviously it is strongly suggested that you don't disable this. The only reason you may want to disable the crosshair would be to take a "clean" screenshot.
Show Blood: If set to No, blood will not be shown whenever a soldier is shot or injured. Set to suit your level of squeamishness, has no real impact on performance.
Enable Console: If set to Yes, this allows you to access the in-game command console by pressing the ~ key (the key above ESC). It is strongly suggested you set this option to Yes so that you can use the console commands for the game - see the Advanced Tweaking section.
Optimal System Settings: If you click this option and select Yes, all your graphics and sound settings will be reset to their 'optimal' value as detected by the game. This is not recommended, as it is much better for you to take the time to manually configure each individual setting for your system. The system-detected values are usually quite conservative and certainly not optimal. However if you run into any problems, you can use this option to quickly restore all the default settings.
Multiplayer Settings
As noted further above, when you launch Call of Duty 2 Multiplayer, your settings are completely separate from COD 2 Singleplayer. As such you must go through and readjust all your settings as you'd prefer - you may want to keep them lower (and/or run in DX7 mode) to ensure consistently higher FPS in multiplayer to gain a competitive advantage. The settings below are unique to Multiplayer:
Voice Chat: If you are using Voice Chat (See Voice Chat settings below), you can press this key to talk to other people on the same channel. If you don't use voice chat in games, ignore this key and make sure to disable Voice Chat in the options further below.
Vote Yes, Vote No: At times people may start a vote in a game to do such things as kick another player, or switch to another map. These keys will allow you to vote Yes or No in such votes.
Chat, Team Chat, Quick Chat: When you press the Chat key, it opens a small prompt on the screen where you can type in text to say to everyone on the server. Team Chat is the same principle, however anything you type here will only be seen by your teammates , and will be in a blue color. Quick Chat allows you to press a particular key to bring up a sub-menu of commands, from there, you can select a range of preset voice commands to yell out in the game.
Allow Downloading: If set to Yes, this allows the server you have joined to send you any mods/maps you are missing to play on that particular server. Some servers run modifications, or custom maps, and joining these will mean you will have to first download the map/mod (very slowly) if this setting is enabled.
Draw HUD: If you want to turn off Heads Up Display (HUD) elements like your compass, ammo count, etc. while playing Multiplayer, set this to Yes. There is no major performance difference either way, so set to suit your tastes.
Connection: Since Call of Duty 2 is designed for broadband connections, the only options here are ISDN or LAN/Cable/DSL. Only choose ISDN if you have a very slow connection, or if you find that you're lagging on all the servers you play on (high ping), especially ones near to you. Otherwise select LAN/Cable/DSL.
Weapon Menu: At the start of every Multiplayer round, you have to choose a weapon to spawn with. This key will allow you to bring up the weapon menu whenever you want, so that you can respawn in the same map with a different weapon if you so choose.
Player Name: Enter your player nickname here - this is the name shown for your player when you are online.
Enter Key Code: You should only click this option if you need to change your CD Key Code. Normally, once you've installed the game your key code should work all the time, and you shouldn't need to change it again.
Voice Chat
This section is for those who use in-game voice chat, with a microphone and speakers/headphones, to communicate with other players in the game. If set to Yes here, voice chat will use Voice Over IP to transmit your voice to other players and vice versa, however it will also use some bandwidth to do so. If you don't use voice chat, set this option to No to help maintain a lower ping.
Join Game
Once you've made all the suitable adjustments to your settings, to join a multiplayer game of COD 2 on the Internet, click the Join Game option on the main menu, then in the server browser, make sure the Source option at the top is set to Internet. Now click the 'Refresh List' option at the top right and wait for the server list to be populated. Click the Ping column header at the far right to sort servers from lowest to highest ping - the lower the ping shown (hopefully in the low double-digits), the smoother your online gameplay will be. Check the figure in the '# Players' column to make sure the server isn't full (or empty), and then double-click on the server name to join.
Note: if you want to refine this server list, click the 'Filter Servers' option at the top right and select the types of servers you want to exclude from being displayed. Once done reclick the 'Refresh List' option.
Creating a Server: I don't have much experience creating game servers, so I don't usually provide detailed advice on this in my guides. It can take up quite a bit of space to go into server creation/maintenance commands and options, and it's not necessary for most players who are clients (i.e. play on other peoples' servers). I apologize for this decision, and if you want to find out more about how to set up your own server, check the game's Readme.txt file along with the game manual for detailed instructions and commands.
PunkBuster: A final note about COD 2 multiplayer: PunkBuster anti-cheat software support was added to COD2 as of the 1.2 Patch. Every time you connect to an online server which has enabled PunkBuster support - and most will - then you may have to wait as the latest version of PunkBuster is downloaded. If you would prefer to update PunkBuster manually before joining a game, and indeed this is recommended, use the PBSetup utility. It's free and easy to use.
The next page looks at advanced tweaking for Call of Duty 2.
|
|